创建openwrt固件个人专用ipk包(2)脚本篇
个人专用openwrt固件的打造。
上一篇已经写了Makefile文件,这篇主要写my-default-settings的改写。这里我主要针对官网openwrt 22.03之后的版本。版本变化如有配置不同,应酌情修改。

lean里面的配置主要写的是针对旧版openwrt的一些配置,重新设置了版本号,改了路由器密码,一些防火墙设置等等。我们这里都不需要,删除全部只留下 最上 及 最下 一行。
#!/bin/sh

#中间全删去,在这里开始写代码

exit 0
首先,设置各种应用ipk也使用中文;把时区改为中国时区,不然是用的是UTC国际时。
#设置中文
uci set luci.main.lang=zh_cn
uci commit luci
#设置时区、ntp服务器
uci set system.@system[0].timezone=CST-8
uci set system.@system[0].zonename=Asia/Shanghai

uci delete system.ntp
uci set system.ntp='timeserver'
#uci set system.ntp.use_dhcp='0'
uci add_list system.ntp.server='ntp.aliyun.com'
uci add_list system.ntp.server='time1.cloud.tencent.com'
uci add_list system.ntp.server='time.ustc.edu.cn'
uci add_list system.ntp.server='cn.pool.ntp.org'
uci commit system
这里都是用的uci命令,UCI是集中式配置信息管理接口(Unified Configuration Interface)的缩写,他是OpenWrt引进的一套配置 参数管理系统。方便在ssh里输入,并进行管理。UCI管理了OpenWrt下最主要的系统配置参数,并且提供了简单、容易、标准化的人机交互接口。UCI中 已经包含了网络配置、无线配置、系统信息配置等作为基本路由器所需的主要配置参数。同时UCI也可以帮助开发人 员快速的建立一套基于OpenWrt的智能路由产品控制界面。详细使用方法见官方知识库。
第二,WAN、LAN口设置
对拨号等进行设置
uci set network.wan.proto='pppoe'
uci set network.wan.username= your account
uci set network.wan.password= your password
uci commit network
设置路由器拨号账户及密码,如果不是pppoe拨号协议,请改为你宽带供应商的协议。这些都可以在你正常运行的路由器中用winscp查看,位置是/etc/config/network 。config interface 'wan'处查看。
想修改路由器登录ip,可以这么写
#修改路由器登录地址为192.168.22.1
uci set network.lan.ipaddr='192.168.22.1'
uci commit network
如果不想用运营商的DNS,设置为公共DNS用:
uci set network.wan.peerdns='0'
uci add_list network.wan.dns='114.114.114.114'
uci add_list network.wan.dns='223.5.5.5'
uci commit network
以下针对软路由WAN、LAN口:
硬路由各网口应该源码里面都定义好了,应该无需修改。
对软路由LAN口设置,官方新版openwrt和以前不大一样,以前可以直接使用ifname进行配置,现在需要放在br-lan虚拟网桥下,具体见下:
uci delete network.@device[0]
uci add network device
uci set network.@device[0].name='br-lan'
uci set network.@device[0].type='bridge'
uci add_list network.@device[0].ports='eth0'
uci add_list network.@device[0].ports='eth1'
uci add_list network.@device[0].ports='eth2'
uci add_list network.@device[0].ports='eth4'
uci add_list network.@device[0].ports='eth5'

uci set network.lan.proto='static'
uci set network.lan.device='br-lan'
uci commit network
官方openwrt默认LAN口是br-lan虚拟网桥,br-lan下只有eth1。删除默认的device<section名称>,重新创建section device,并name为br-lan。类型桥接bridge,ports网口选项增加除WAN口eth3以外的其他网口。由于有删除默认device,真正应用时候,注意该段的前后关系。
我的是exsi下的软路由,wan口是eth3,其他为lan口,不用脚本修改的话每次重装openwrt进入都要用xshell登录路由器进行修改,按默认的是无法拨号的,十分麻烦。如果碰上LAN口变成了WAN口,xshell也登录不上,还要登录exsi的VNC控制台用vi进行修改。
uci set network.wan.device='eth3'
uci set network.wan6.device='eth3'
uci commit network
这里设置完WAN口。
第三、增加快速连接
echo -n "net.ipv4.tcp_fastopen = 3" >> /etc/sysctl.conf
第四、增加个人防火墙
新版openwrt用上了fw4 nftbales,虽然兼容原先的iptables命令,却去掉了个人自定义防火墙,这让人十分不方便,原先控制终端设备输入iptables命令即可实现,现在就比较麻烦。好在一番摸索,解决了这个问题。先看代码:
#创建自己的防火墙表user
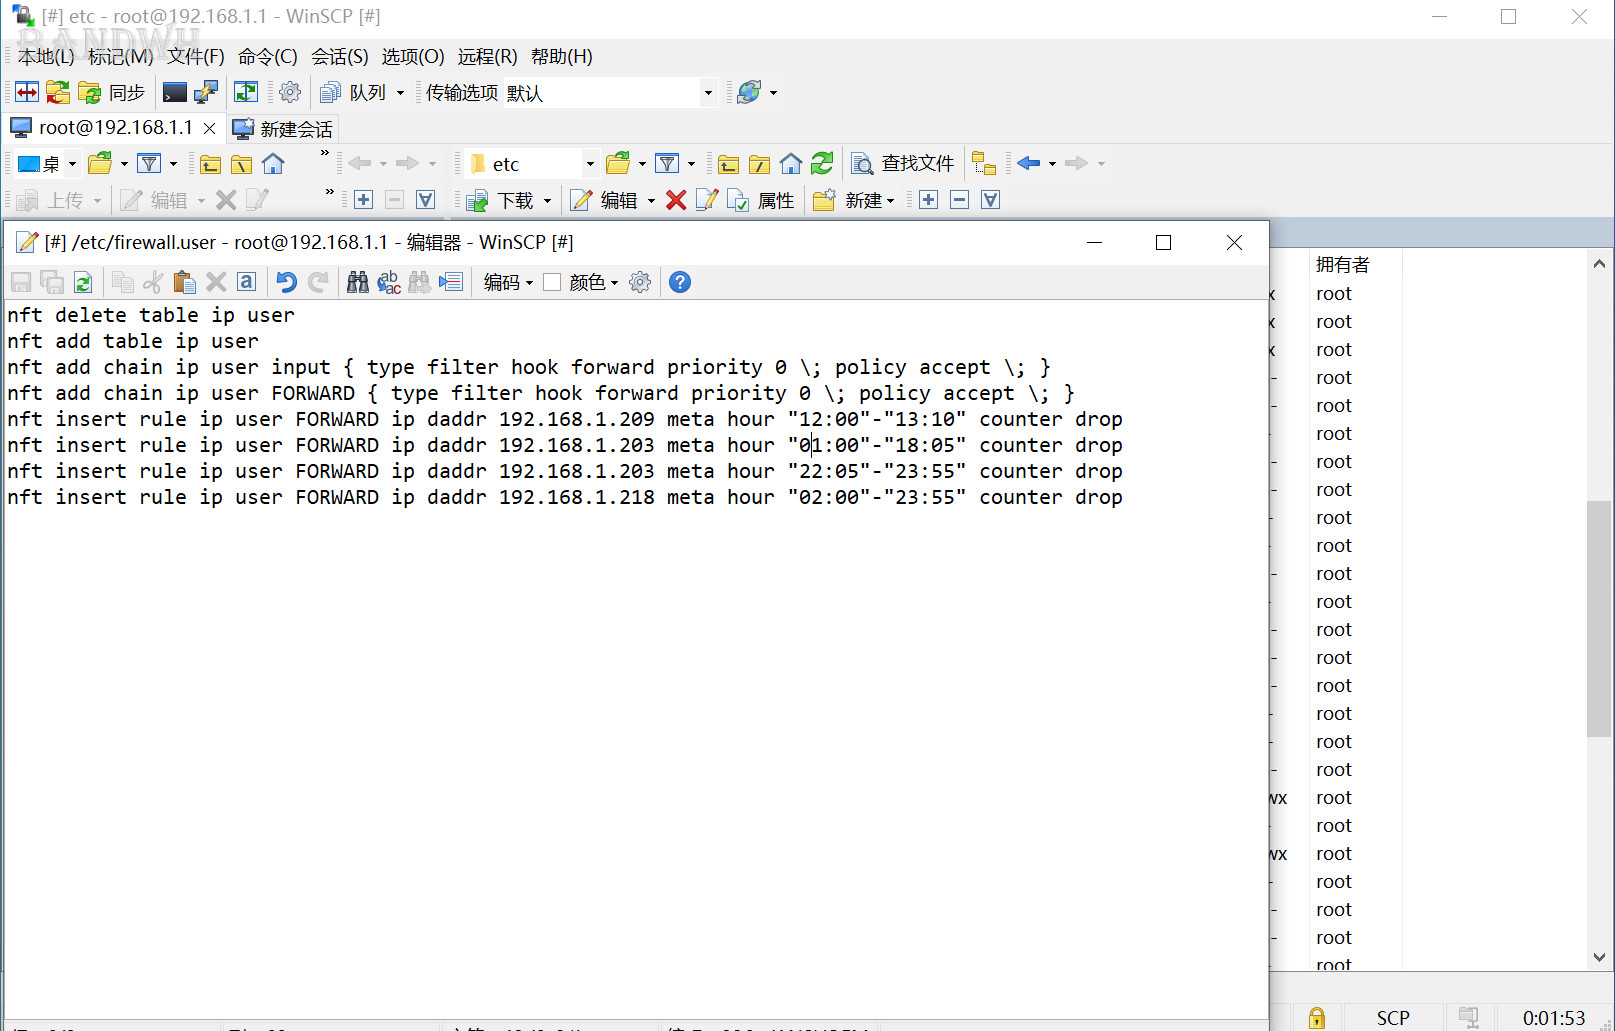
echo 'nft delete table ip user' >>/etc/firewall.user
echo 'nft add table ip user' >>/etc/firewall.user
echo 'nft add chain ip user input { type filter hook input priority 0 \; policy accept \; }' >>/etc/firewall.user
echo 'nft add chain ip user FORWARD { type filter hook forward priority 0 \; policy accept \; }' >>/etc/firewall.user
#劫持53端口流量,由路由器处理,科学上网更稳定
echo 'nft add chain ip user PREROUTING { type nat hook prerouting priority dstnat \; policy accept \; }' >>/etc/firewall.user
echo 'nft add rule ip user PREROUTING tcp dport 53 counter redirect to :53' >>/etc/firewall.user
echo 'nft add rule ip user PREROUTING udp dport 53 counter redirect to :53' >>/etc/firewall.user
#下面自定义防火墙规则
echo 'nft insert rule ip user FORWARD ip daddr 192.168.1.209 meta hour "12:00"-"13:10" counter drop' >>/etc/firewall.user
echo 'nft insert rule ip user FORWARD ip daddr 192.168.1.203 meta hour "01:00"-"18:05" counter drop' >>/etc/firewall.user
echo 'nft insert rule ip user FORWARD ip daddr 192.168.1.203 meta hour "22:05"-"23:55" counter drop' >>/etc/firewall.user
echo 'nft insert rule ip user FORWARD ip daddr 192.168.1.218 meta hour "02:00"-"23:55" counter drop' >>/etc/firewall.user
#让防火墙调用script
uci set firewall.userfirewall='include'
uci set firewall.@include[-1].type="script"
uci set firewall.@include[-1].path="/etc/firewall.user"
uci set firewall.@include[-1].fw4_compatible="1"
uci commit firewall
/etc/init.d/firewall restart这段意思是本脚本先创建/etc/firewall.user文件,然后在firewall.user里写入相关nftables代码;再在openwrt网络—防火墙写入自定义规则用于执行firewall.user脚本文件。这里加上了劫持局域网内所有53端口流量(域名解析)到路由器解析,科学上网更稳定。
这里为了能够后期能够编辑并运行,所有规则都是在自定义的user表里。firewall.user脚本文件先删除自定义的user表,再创建user表。因为nftables单独删除一个规则很麻烦。
nft -a list table filter 看后面输出的handle,如handle 6 ;删除命令: nft delete rule filter FORWARD handle 6。原先的iptables命令
iptables -I FORWARD -d 192.168.1.108 -m time --kerneltz --timestart 21:58 --timestop 23:55 -j DROP 可以在ssh里用iptables-translate -I FORWARD -d 192.168.1.108 -m time --kerneltz --timestart 21:58 --timestop 23:55 -j DROP转换,会显示 nft insert rule ip filter FORWARD ip daddr 192.168.1.108 meta hour "21:58:00"-"23:55:00" counter drop。查看自定义的user表所有规则,用
nft list table ip user。后期在/etc/firewall.user里增加或删除规则后,需要在ssh里执行/etc/init.d/firewall restart进行重启。或者到系统—启动项—firewall 重启。

官方还是推荐使用uci代码如:
#官方推荐的
uci add firewall rule
uci set firewall.@rule[-1].name="FORRBIDDEN"
uci set firewall.@rule[-1].src="lan"
uci set firewall.@rule[-1].dest="wan"
uci set firewall.@rule[-1].start_time="12:00:00"
uci set firewall.@rule[-1].stop_time="13:10:00"
uci set firewall.@rule[-1].src_ip="192.168.1.209"
uci set firewall.@rule[-1].target="REJECT"
uci commit firewall
规则一多,写起来很麻烦,还是不如一条nftables命令来的好。
第五、移动配置文件
在上一篇中我们把Dnsmasq、shaowsockr plus等的配置文件写入了/usr/share/linshi/文件夹里,这里就可以把它们移动到/etc/config文件夹下面了。
mv /usr/share/linshi/dhcp /etc/config/
mv /usr/share/linshi/shadowsocksr /etc/config/
mv /usr/share/linshi/nft-qos /etc/config/
这样,路由器刷入固件后各应用ipk就可以正常工作了,无需配置。
第六、adbyby等其他应用ipk要能开机运行的话,可以写入
sed -i "s/enable '0'/enable '1'/g" /etc/config/adbyby
#想屏蔽的网址,如weibo,cn
echo "weibo.cn" >> /usr/share/adbyby/adblack.conf
第七,对应用ipk进行修改
比如现在的SSRP++不能订阅V2RAY机场有alterid>0的v2ray节点,在这里面修改ssrp++的源码就可以继续订阅。
sed -i "/document.getElementsByName('cbid.shadowsocksr.' + sid + '.server_port')\[0\].value = ssm.port;/a\ \t\t\tdocument.getElementsByName('cbid.shadowsocksr.' + sid + '.alter_id')\[0\].value = ssm.aid; " /usr/lib/lua/luci/view/shadowsocksr/ssrurl.htm
line=`sed -n '/if info.aid and (tonumber(info.aid) > 0) then/=' /usr/share/shadowsocksr/subscribe.lua `
sed -i "${line},$((${line}+2))d" /usr/share/shadowsocksr/subscribe.lua
sed -i "/result.v2ray_protocol = 'vmess'/a\ \t\tresult.alter_id = info.aid" /usr/share/shadowsocksr/subscribe.lua
sed -i '/-- VmessId/i -- AlterId\no = s:option(Value, "alter_id", translate("AlterId"))\no.datatype = "port"\no.default = 16\no.rmempty = true\no:depends({type = "v2ray", v2ray_protocol = "vmess"})' /usr/lib/lua/luci/model/cbi/shadowsocksr/client-config.lua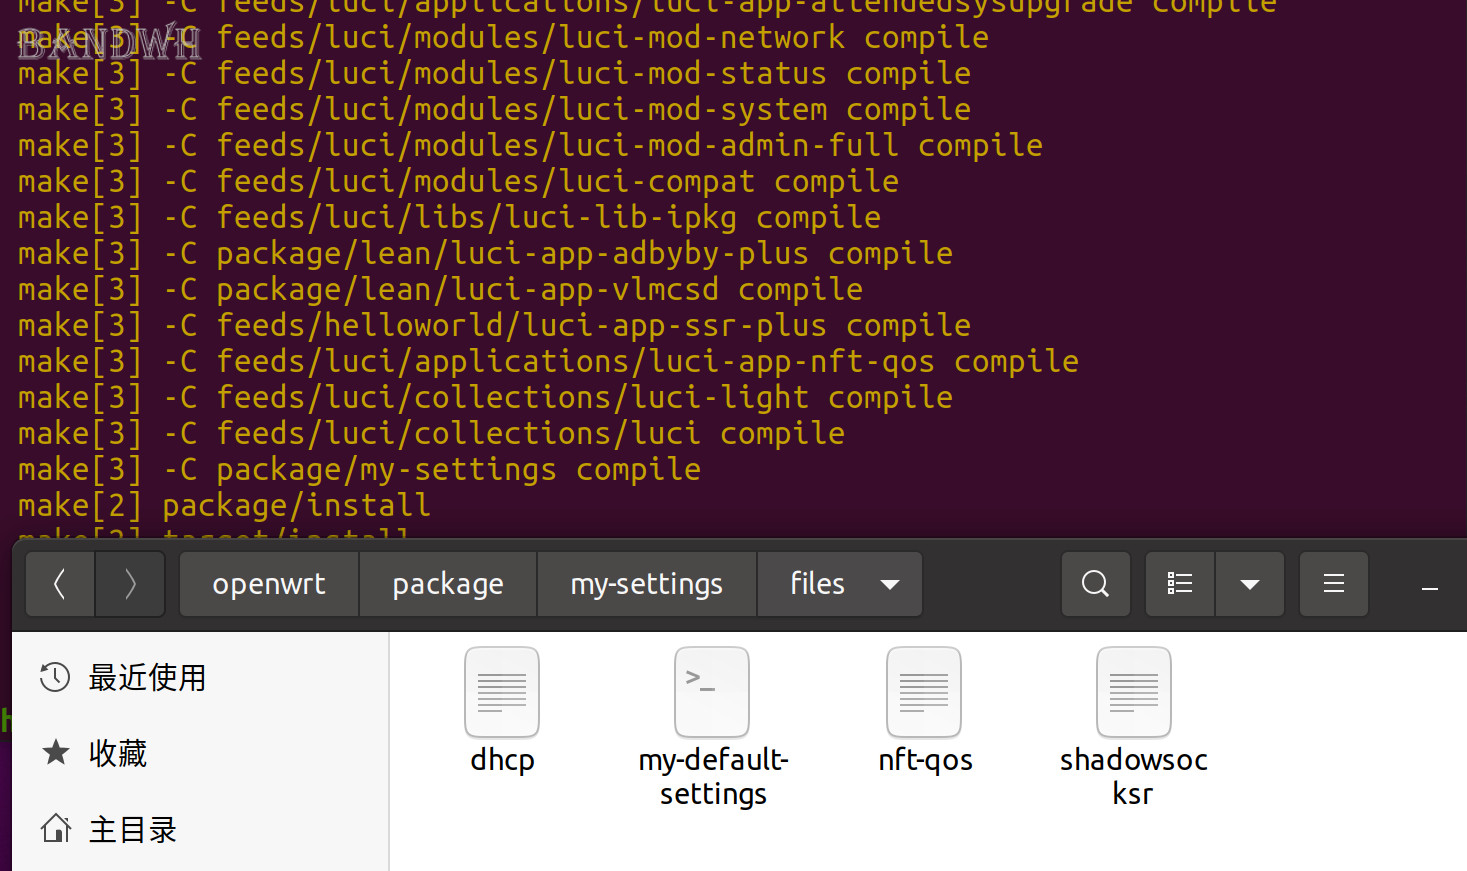
sed -i '/id = server.vmess_id,/a\ \t\t\t\t\t\talterId = (server.v2ray_protocol == "vmess" or not server.v2ray_protocol) and tonumber(server.alter_id) or nil,' /usr/share/shadowsocksr/gen_config.lua总之,在这里你可以写入你想要的代码,尽情魔改路由器。写完后把整个my-settings文件夹放到openwrt/package/文件夹下,make menuconfig配置路由器的时候在luci界面选上my-settings就可以了。如编译报错应检查Makefile文件,固件安装完后不按预期工作,应检查这个my-default-settings里写的代码是否正确。
这样你编译出来的固件就是你个人专用固件了。
最后附上编辑好的完整示例my-settings代码,供你修改。点我下载
技术不断升级,请注意文章时效性。
本站文章,欢迎转发。转载请注明出处:https://www.bandwh.com/net/578.html
![]() 折腾之路●一起折腾
折腾之路●一起折腾
评论列表(3条)
/etc/config/firewall 默认配置就有 /etc/firewall.user
我写入 iptables 规则到手动创建的 /etc/firewall.user 重启系统,重启防火墙都不生效,不知道啥原因
@言西:直接在shell里运行你的iptables规则看看生不生效。如果不生效考虑用nftables
@BandWh.com:直接在shell里运行能生效,FW4 和 passwall 不太对付,我最后放弃 fw4,改回 fw3 就正常了